
Soft Gluten-Free Sandwich Bread Recipe
Introduction
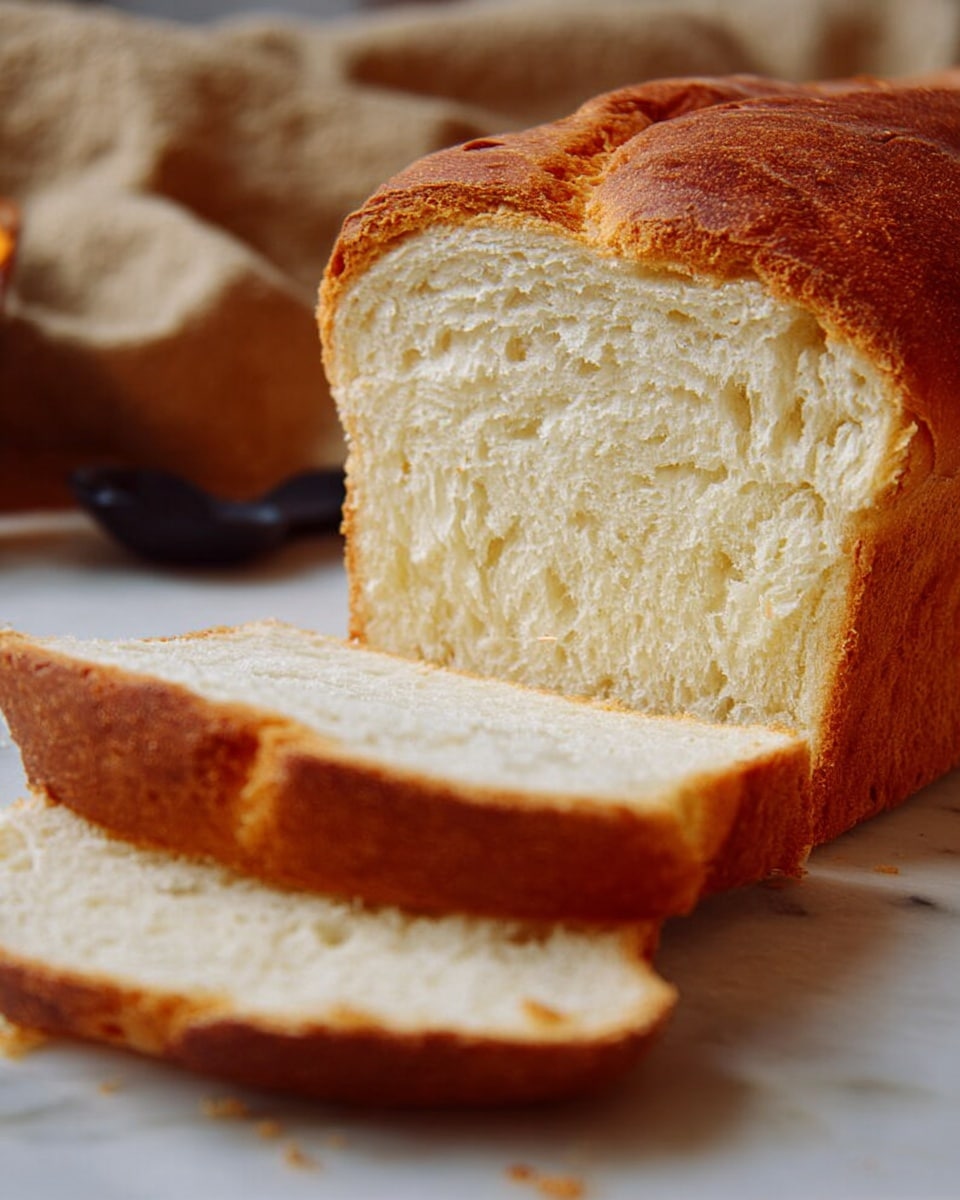
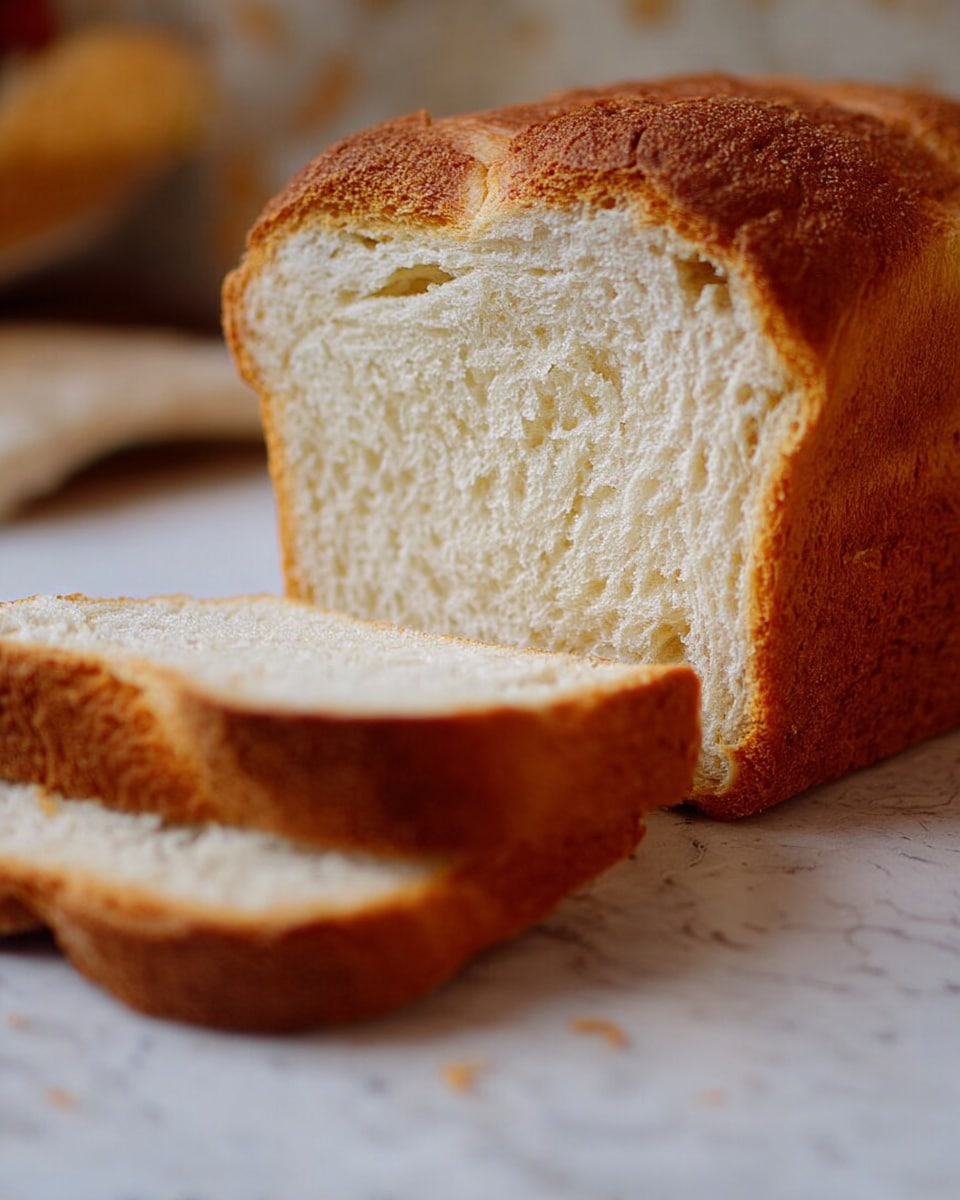
This soft gluten-free sandwich bread is perfect for anyone looking for a tender, fluffy loaf without wheat. With a simple mix of wholesome ingredients and easy steps, you can enjoy homemade gluten-free bread that is ideal for sandwiches or toast.
Ingredients
- 1 1/2 cups Water
- 3 tablespoons Honey
- 2 1/2 teaspoons Active Dry Yeast
- 3 cups Gluten-Free All-Purpose Flour
- 1 1/2 teaspoons Xanthan Gum
- 4 teaspoons Baking Powder
- 1 teaspoon Salt
- 2 teaspoons Apple Cider Vinegar
- 1/4 cup Olive Oil
- 2 Eggs
Instructions
- Step 1: In a measuring cup, warm the water to just above body temperature—warm to the touch. Stir in the honey, then add the yeast last. Set aside and allow the mixture to proof for about 10 minutes.
- Step 2: In a small bowl, combine the gluten-free all-purpose flour, xanthan gum, baking powder, and salt.
- Step 3: In the bowl of a stand mixer fitted with a paddle attachment, mix the apple cider vinegar, olive oil, and eggs together for a few seconds.
- Step 4: Add the proofed yeast mixture to the stand mixer and mix again briefly.
- Step 5: Add the dry flour mixture and beat on medium-high speed for approximately 3 minutes. The dough will be wet but thick and sticky.
- Step 6: Prepare a 9×5-inch loaf pan by oiling and flouring it or using a non-stick spray if necessary.
- Step 7: Using a spatula, scrape the dough into the prepared pan. Smooth the top with a spatula or wet fingers. Set the loaf on top of your stove to proof while preheating the oven.
- Step 8: Preheat your oven to 375°F (190°C).
- Step 9: Bake the bread for 35-45 minutes. If the crust begins to darken too fast, tent it loosely with foil and continue baking until done.
- Step 10: Once baked, carefully remove the loaf from the oven. Within 1-2 minutes, turn the bread out of the pan onto its side on a cooling rack; do not let it sit in the pan to rest.
- Step 11: Allow the bread to cool completely before slicing to ensure clean, even slices.
Tips & Variations
- Use room temperature eggs for better mixing and dough consistency.
- For a softer crust, brush the top with melted butter right after baking.
- Substitute honey with maple syrup for a different flavor profile.
- If your flour blend doesn’t contain xanthan gum, be sure to add it as this helps the bread hold together well.
Storage
Store the cooled bread in an airtight container or bread bag at room temperature for up to 3 days. For longer storage, slice and freeze the bread; thaw slices as needed. Reheat gently in a toaster or oven for best texture.
How to Serve
Serve this delicious recipe with your favorite sides.
FAQs
Can I use a different flour blend?
Yes, you can use any gluten-free all-purpose flour blend that is suitable for baking. Just ensure it contains or you add xanthan gum to help with texture.
Why shouldn’t I let the bread rest in the pan after baking?
Gluten-free bread can become soggy if left in the pan due to steam; removing it promptly helps maintain a firmer, crisp crust and prevents moisture buildup.
Print
Soft Gluten-Free Sandwich Bread Recipe
- Total Time: 55 minutes
- Yield: 1 loaf (approximately 12 slices) 1x
- Diet: Gluten Free
Description
This Soft Gluten-Free Sandwich Bread recipe offers a tender, moist, and flavorful loaf that’s perfect for anyone avoiding gluten. Using a combination of gluten-free flour, xanthan gum, and a careful yeast proofing process, this bread achieves a soft texture ideal for sandwiches and everyday use. The addition of honey and apple cider vinegar enhances flavor and helps with yeast activation and dough rise. Baked in a standard oven, this bread comes together with simple pantry ingredients and is an excellent homemade alternative to store-bought gluten-free breads.
Ingredients
Wet Ingredients
- 1 1/2 cups Water
- 3 tablespoons Honey
- 2 teaspoons Apple Cider Vinegar
- 1/4 cup Olive Oil
- 2 Eggs
- 2 1/2 teaspoons Active Dry Yeast
Dry Ingredients
- 3 cups Gluten-Free All-Purpose Flour
- 1 1/2 teaspoons Xanthan Gum
- 4 teaspoons Baking Powder
- 1 teaspoon Salt
Instructions
- Proof the yeast: Warm the water to just above body temperature, ensuring it feels warm to the touch. Stir in honey until dissolved, then add the active dry yeast last. Set aside and allow the mixture to proof for approximately 10 minutes until bubbly.
- Mix dry ingredients: In a separate bowl, combine the gluten-free all-purpose flour, xanthan gum, baking powder, and salt thoroughly to distribute all leavening agents and gums evenly.
- Combine wet ingredients: In the bowl of a stand mixer fitted with the paddle attachment, mix the apple cider vinegar, olive oil, and eggs just for a few seconds until combined.
- Add yeast mixture: Pour the proofed yeast mixture into the wet ingredients and mix briefly to incorporate.
- Add dry ingredients and beat dough: Slowly add the dry mix to the wet ingredients and beat on medium-high speed for approximately 3 minutes. The dough should be wet, thick, and sticky.
- Prepare the pan: Lightly oil and flour a 9×5 loaf pan or spray it with non-stick coating if necessary. This step ensures easy release after baking.
- Shape and proof the dough: Using a spatula, transfer the sticky dough into the prepared loaf pan. Smooth the surface with a spatula or wet fingers because the dough will not smooth itself. Place the pan on top of your stove to proof while the oven preheats.
- Preheat the oven: Set your oven to 375°F (190°C) to prepare for baking.
- Bake the bread: Bake the loaf for approximately 35 to 45 minutes. If the crust starts to darken too much before the bread is fully baked, tent the loaf loosely with foil and continue baking until a toothpick inserted comes out clean.
- Cool properly: Immediately after removing from the oven, carefully turn the bread out of the pan onto its side on a cooling rack within 1-2 minutes. Do not let it rest in the pan as this may cause sogginess.
- Final cooling: Allow the bread to cool completely before slicing to ensure the best texture and slicing quality.
Notes
- Ensure the water is not too hot when proofing yeast, as excessive heat can kill the yeast.
- The dough is sticky and wet, which is typical for gluten-free breads; avoid adding extra flour which can make the bread dense.
- Tenting the bread with foil during baking helps prevent excessive crust darkening.
- Use wet fingers to smooth the dough surface to prevent sticking.
- Cooling the bread properly prevents it from crumbling and improves sliceability.
- Prep Time: 15 minutes
- Cook Time: 40 minutes
- Category: Bread
- Method: Baking
- Cuisine: American
Keywords: gluten-free bread, sandwich bread, homemade gluten-free bread, soft gluten-free loaf, yeast bread gluten free


