
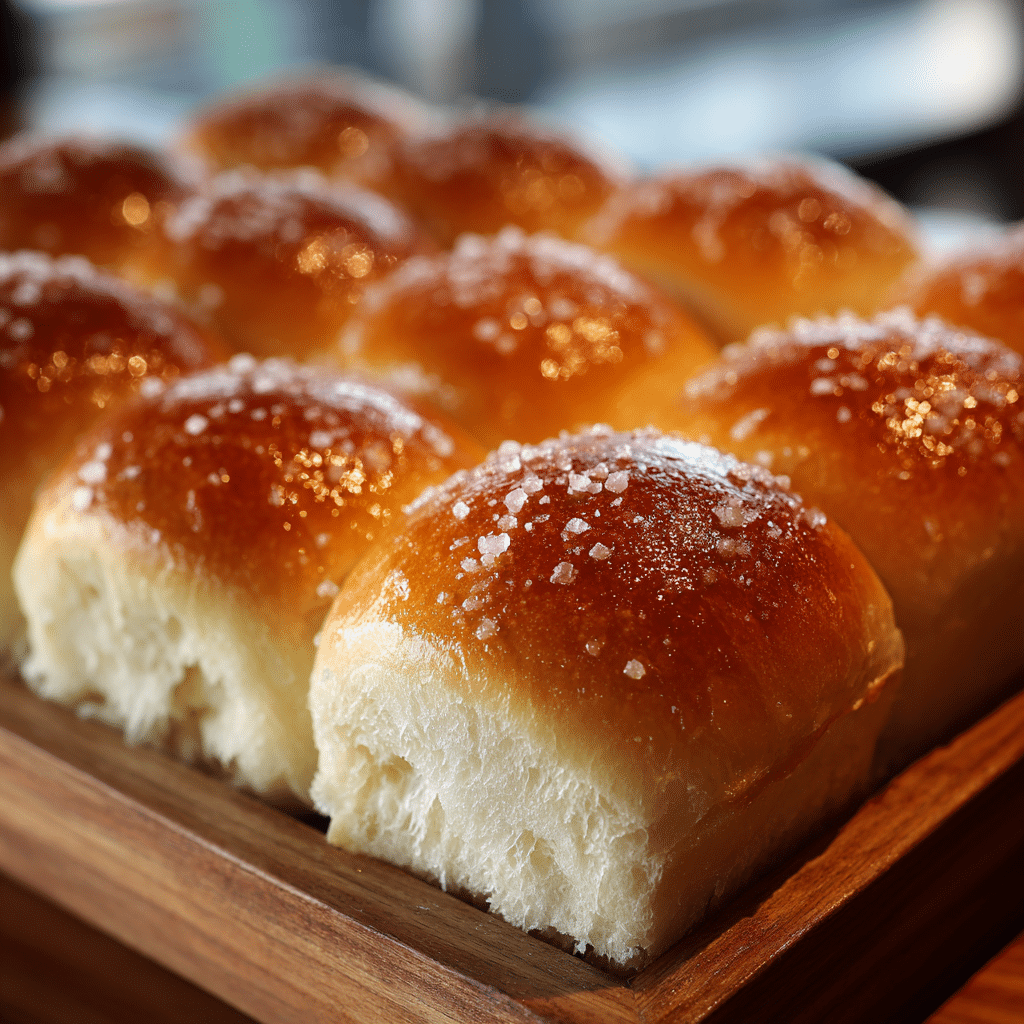
One Hour Dinner Rolls Recipe
There’s something incredibly comforting and satisfying about fresh bread, especially when it comes together quickly and easily. These One Hour Dinner Rolls are the perfect solution for those moments when you want soft, warm, fluffy rolls but don’t have hours to wait. With simple ingredients and a foolproof method, these rolls rise beautifully and bake up golden, making them a standout addition to any meal. Whether you’re serving a family dinner or hosting guests, these rolls will definitely win hearts and satisfy hungry appetites in no time.

Ingredients You’ll Need
Never underestimate the power of simple ingredients. Each one plays a vital role in building the perfect texture, subtle sweetness, and rich color of these rolls. From the chewy softness contributed by the flour to the tender crust from butter, here’s everything you’ll need:
- All-purpose flour: Using 4 cups ensures a tender but sturdy dough that’s easy to knead and handle.
- Granulated sugar: Just 2 tablespoons add a touch of sweetness that balances the savory elements perfectly.
- Instant yeast: 1 tablespoon to give the rolls their light, fluffy rise in a short time.
- Salt: 1 teaspoon to deepen flavor and enhance the other ingredients.
- Warm milk: 1 cup at 110°F gently activates the yeast and creates a soft dough texture.
- Unsalted butter: 1/4 cup melted adds richness and a lovely golden crust when brushed on top.
- Large egg: This binds the dough and gives the rolls a tender crumb and beautiful color.
How to Make One Hour Dinner Rolls
Step 1: Mix the Dry Ingredients
Begin by combining 2 cups of flour, sugar, instant yeast, and salt in a large bowl. This simple mix forms the salty, sweet foundation for the dough. Stirring these together upfront ensures even distribution, so every roll gets that perfect flavor.
Step 2: Whisk the Wet Ingredients
In a separate bowl, whisk warm milk, melted butter, and egg until combined. These wet ingredients bring moisture, richness, and a slight tenderness to the dough’s texture. The temperature of the milk is crucial here — too hot and it will kill the yeast; too cool and the yeast won’t activate properly.
Step 3: Combine Wet and Dry to Form Dough
Pour the wet mixture into the dry ingredients and stir just until a soft dough forms. This starts the magical transformation from separate ingredients into a unified base for your rolls.
Step 4: Add Remaining Flour Gradually
Gradually incorporate the remaining flour, about 1/2 cup at a time. This ensures the dough reaches the perfect consistency — no longer sticky but still soft and manageable. It’s a delicate balance that makes kneading much easier later on.
Step 5: Knead the Dough
Place the dough on a lightly floured surface and knead for about 5 minutes until smooth and elastic. This step develops the gluten, giving the rolls that wonderfully chewy texture and helping them rise evenly while baking.
Step 6: First Rest
Transfer the dough to a lightly greased bowl, cover it with a clean kitchen towel, and let it rest in a warm spot for 10 minutes. This short rest allows the yeast to wake up and start creating gas bubbles that will fluff up your rolls.
Step 7: Shape the Rolls
Gently punch down the dough to release any large air bubbles, then divide it into 12 equal pieces. Shape each piece into a smooth ball by tucking the edges under to create a lovely round shape. This step helps the rolls have an even rise and uniform appearance.
Step 8: Arrange on Baking Sheet
Place the dough balls on a parchment-lined or greased baking sheet, leaving about an inch between each so they have room to expand without sticking together.
Step 9: Second Rise
Cover the rolls again and let them rise for another 15 minutes in a warm environment. This second proofing is where they get that beautiful puffiness and softness we all crave.
Step 10: Bake to Perfection
Preheat your oven to 375°F (190°C) and bake the rolls for 15 to 20 minutes, or until the tops turn golden brown. That gorgeous color means your rolls are perfectly baked and ready to be enjoyed.
Step 11: Optional Butter Brush
Right after removing from the oven, brush the warm rolls with extra melted butter for a rich flavor and a shiny, inviting finish. This little touch takes your One Hour Dinner Rolls to the next level of deliciousness.
How to Serve One Hour Dinner Rolls
Garnishes
These rolls are divine on their own but pairing them with a pat of herb-infused butter, garlic butter, or a sprinkle of flaky sea salt can personalize each bite. Freshly chopped rosemary or thyme mixed with butter brings a fragrant pop, perfect for impressing guests.
Side Dishes
One Hour Dinner Rolls naturally complement so many meals. They’re ideal served alongside hearty soups, stews, or roasted meats. Their soft texture makes them perfect for soaking up savory gravies or dipping into olive oil and balsamic vinegar.
Creative Ways to Present
Want to jazz things up? Serve the rolls in a warm basket lined with a colorful cloth napkin for a cozy touch. Or slice them in half and fill with your favorite deli meats and cheeses for quick sliders. These rolls are also fantastic when turned into mini bread bowls filled with creamy dips.
Make Ahead and Storage
Storing Leftovers
Wrap any leftover rolls tightly in plastic wrap or place them in an airtight container to maintain their softness. Stored at room temperature, they stay fresh for 1 to 2 days. If you want to enjoy them longer, freezing is your friend.
Freezing
These rolls freeze beautifully. After baking, let them cool completely, then freeze in a sealed bag or container. When you’re ready, thaw at room temperature or warm them gently in the oven.
Reheating
To revive their fresh-from-the-oven texture, reheat rolls in a preheated oven at 300°F (150°C) for 5 to 10 minutes. For a quick fix, microwave them wrapped in a damp paper towel for about 15 seconds to restore softness.
FAQs
Can I use active dry yeast instead of instant yeast?
Yes! If using active dry yeast, proof it first in the warm milk with sugar until bubbly before adding to the dry ingredients. This adds an extra 5 to 10 minutes to your prep time.
What temperature should the milk be for best results?
The milk should be warm, around 110°F (43°C). This range is ideal for activating the yeast without killing it, helping the dough rise quickly.
Can I make these rolls gluten-free?
These rolls rely on gluten development for their structure, so substituting a gluten-free flour requires additional binders and may change the texture. However, there are gluten-free bread recipes specifically designed for quick rolls worth exploring.
How do I know when the rolls are fully baked?
The rolls should be golden brown on top and sound hollow when tapped on the bottom. Using a thermometer, the internal temperature should read around 190°F (88°C) for perfect doneness.
Can I add herbs or cheese to the dough?
Absolutely! Fresh herbs like rosemary or thyme can be kneaded into the dough for an herby twist. Shredded cheese can be folded in or sprinkled on top before baking for an extra flavor boost.
Final Thoughts
These One Hour Dinner Rolls are a game changer for anyone craving fresh homemade bread without the long wait. Their fluffy texture, rich flavor, and beautiful golden crust make them irresistible, whether you’re serving a holiday meal or simply elevating weeknight dinner. Trust me, once you try this recipe, you’ll keep coming back for more easy, delicious rolls that bring warmth and comfort to your table every time.
Print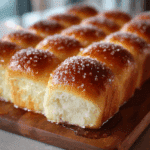
One Hour Dinner Rolls Recipe
- Total Time: 1 hour
- Yield: 12 dinner rolls 1x
- Diet: Vegetarian
Description
These One Hour Dinner Rolls are soft, fluffy, and golden brown, perfect for any meal. Made with simple ingredients and quick rising times, they offer a delightful homemade bread experience in just one hour.
Ingredients
Dough Ingredients
- 4 cups all-purpose flour
- 2 tablespoons granulated sugar
- 1 tablespoon instant yeast
- 1 teaspoon salt
- 1 cup warm milk (about 110°F/43°C)
- 1/4 cup unsalted butter, melted
- 1 large egg
Instructions
- Combine Dry Ingredients: In a large mixing bowl, combine 2 cups of the all-purpose flour, sugar, instant yeast, and salt. Mix well to evenly distribute the dry ingredients.
- Mix Wet Ingredients: In a separate bowl, whisk together the warm milk, melted butter, and egg until fully combined.
- Form Dough: Pour the milk mixture into the dry ingredients and stir until a soft dough begins to form.
- Add Remaining Flour: Gradually add the remaining flour, 1/2 cup at a time, mixing until the dough is no longer sticky and easy to handle.
- Knead Dough: Knead the dough on a lightly floured surface for about 5 minutes until it becomes smooth and elastic.
- First Rise: Place the dough in a lightly greased bowl, cover with a clean kitchen towel, and let rest in a warm area for 10 minutes.
- Shape Rolls: Punch down the dough and divide it into 12 equal pieces. Shape each piece into a ball.
- Arrange on Baking Sheet: Place each dough ball on a baking sheet lined with parchment paper or lightly greased, spacing about 1 inch apart.
- Second Rise: Cover the rolls with the kitchen towel again and let them rise in a warm place for another 15 minutes.
- Preheat Oven: Preheat your oven to 375°F (190°C) while the rolls finish rising.
- Bake Rolls: Bake the rolls for 15-20 minutes or until they turn golden brown on top.
- Optional Butter Brush: Remove from oven and brush the tops with additional melted butter for extra flavor and shine.
Notes
- Use warm milk (around 110°F/43°C) to activate the yeast properly without killing it.
- Do not add all the flour at once to prevent dry, dense rolls; add gradually until correct dough consistency is achieved.
- For softer rolls, brush with melted butter right after baking.
- If dough feels too sticky, dust hands and surface lightly with flour during kneading.
- Ensure your yeast is fresh to get a good rise within the short timeframe.
- Store leftover rolls in an airtight container to maintain freshness for up to 2 days.
- Reheat rolls in a warm oven or microwave to restore softness.
- Prep Time: 20 minutes
- Cook Time: 20 minutes
- Category: Bread
- Method: Baking
- Cuisine: American
Nutrition
- Serving Size: 1 roll
- Calories: 150
- Sugar: 3 g
- Sodium: 220 mg
- Fat: 4 g
- Saturated Fat: 2.5 g
- Unsaturated Fat: 1 g
- Trans Fat: 0 g
- Carbohydrates: 25 g
- Fiber: 1 g
- Protein: 4 g
- Cholesterol: 30 mg
Keywords: dinner rolls, quick bread rolls, yeast rolls, homemade bread, soft rolls, easy dinner rolls


