
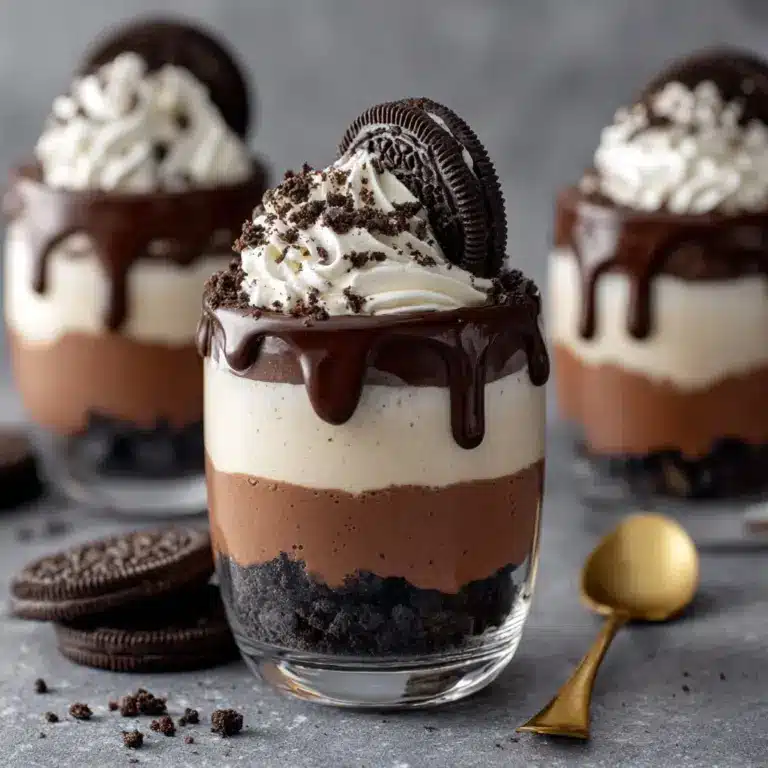
easter pudding cups Recipe
If you’re looking for a delightful, festive dessert that brings the perfect balance of creamy, crunchy, and chocolaty goodness, these easter pudding cups are your new best friend. They’re simple to make yet impressive in presentation, combining smooth homemade pudding with crunchy cookie layers and a playful topping of colorful chocolate eggs. Whether you’re celebrating with family or hosting a spring gathering, these pudding cups will light up the table and satisfy every sweet tooth with their irresistible charm.

Ingredients You’ll Need
These ingredients are straightforward but each plays a crucial role in creating the delicious layers and textures that make these easter pudding cups so irresistible. From the creamy pudding base to the crunchy cookie layers and festive topping, everything comes together beautifully.
- Milk (2 cups): The creamy foundation for your homemade pudding, essential for that silky texture.
- Granulated sugar (1/2 cup): Sweetens the pudding perfectly without overpowering the other flavors.
- Cornstarch (1/4 cup): The key thickening agent to give your pudding that luscious, spoonable consistency.
- Vanilla extract (1 teaspoon): Adds a warm, fragrant note that brings everything together harmoniously.
- Salt (1/4 teaspoon): Just a pinch to enhance the overall flavor and balance the sweetness.
- Whipped topping (1 cup): Lightens the pudding, making it airy and fluffy for that perfect mouthfeel.
- Crushed chocolate sandwich cookies (1 cup): Provides a satisfying crunch and rich chocolate flavor in every bite.
- Chocolate eggs or candy-coated chocolates (1 cup): The charming, colorful finishing touch that makes these pudding cups festive and fun.
How to Make easter pudding cups
Step 1: Prepare the pudding base
Begin by combining the milk, sugar, cornstarch, salt, and vanilla extract in a saucepan. Whisk everything together until the mixture is perfectly smooth, ensuring there are no lumps before heating. This step is crucial because a smooth mixture means your pudding will be silky without any graininess.
Step 2: Cook until thickened
Place the saucepan over medium heat and stir constantly. As it warms, the mixture will start to thicken gradually — keep stirring for about five minutes until it reaches a creamy, custard-like consistency. Once thickened, remove from heat to prevent overcooking and clump formation.
Step 3: Fold in whipped topping
Let the pudding cool slightly so it isn’t hot enough to deflate your whipped topping. Then gently fold the whipped topping into the pudding until just combined. This step transforms your pudding into a light and fluffy treat perfect for layering.
Step 4: Assemble the pudding cups
Start each serving by sprinkling a layer of crushed chocolate sandwich cookies into the bottom of your cups. Follow this with a generous spoonful of pudding. Repeat layering until the cups are nearly full, ending with a smooth pudding layer on top. This alternating of textures creates a delicious contrast in every bite.
Step 5: Add the festive topping
Top each pudding cup with a handful of chocolate eggs or candy-coated chocolates. This not only adds a pop of color that screams spring celebration but also a fun crunch that complements the soft pudding layers beautifully.
Step 6: Chill before serving
Pop the pudding cups into the fridge for at least one hour. Chilling helps the pudding set properly and allows the flavors to meld together, making each bite delightfully enjoyable.
How to Serve easter pudding cups

Garnishes
When serving your easter pudding cups, consider adding extra flair with a sprinkle of mini pastel sprinkles or a few fresh mint leaves. These little touches make your dessert even more festive, elevating the visual appeal and enhancing the flavor profile subtly.
Side Dishes
While these pudding cups stand well on their own, pairing them with light, fresh fruits like strawberries or sliced kiwi offers a refreshing contrast. A crisp spring salad or a small scoop of vanilla ice cream on the side also complements the creamy, chocolaty layers perfectly.
Creative Ways to Present
Serve these pudding cups in clear glass jars or pretty dessert dishes to show off the layers beautifully. You can even customize individual servings with themed picks or edible flowers to suit your Easter table decor. For a crowd-pleasing touch, assemble these cups in mini mason jars so guests can grab and go with ease.
Make Ahead and Storage
Storing Leftovers
Leftover easter pudding cups should be kept covered in the refrigerator. Properly stored, they will stay fresh and delicious for up to 3 days, making for a perfect next-day treat or a make-ahead dessert option.
Freezing
While these pudding cups taste best fresh, you can freeze them if necessary. Use airtight containers and freeze for up to 1 month. Thaw overnight in the fridge before serving, but note the texture of the whipped topping might change slightly after freezing.
Reheating
Since this dessert is best served chilled, reheating isn’t recommended. If you need to bring the pudding to room temperature, simply leave it out for 15-20 minutes before serving, but avoid microwaving as it can melt the creamy layers and candy decorations.
FAQs
Can I use a different type of cookie instead of chocolate sandwich cookies?
Absolutely! You can swap in any cookie you love, like graham crackers or shortbread, for a different texture and flavor. Just make sure they hold up well when layered with the pudding.
Is it possible to make these pudding cups vegan?
Yes, by using non-dairy milk and a plant-based whipped topping, along with vegan-friendly cookies and chocolates, you can easily create a vegan-friendly version of these easter pudding cups.
How long does it take to prepare these pudding cups?
The hands-on preparation time is around 15-20 minutes, plus about an hour of chilling time. They’re quick to whip up and perfect for when you want an easy yet special dessert.
Can I prepare these pudding cups ahead of time for a party?
Definitely! These pudding cups are great make-ahead desserts. Prepare them a day in advance, keep refrigerated, and you’ll save yourself time on the day of your event.
What’s the best way to crush the chocolate sandwich cookies?
You can place cookies in a sealed plastic bag and gently crush them with a rolling pin or pulse briefly in a food processor. Aim for coarse crumbs so you get lovely crunchy bits in your pudding layers.
Final Thoughts
These easter pudding cups are a joyful way to celebrate the season with a dessert that’s both delightful and straightforward. The layered textures, festive decoration, and homemade pudding base make it a crowd-pleaser that’s certain to become a springtime staple. Give this recipe a try and watch as it wins hearts at your next Easter gathering!
Print
easter pudding cups Recipe
- Total Time: 1 hour 20 minutes
- Yield: 6 servings 1x
- Diet: Vegetarian
Description
These Easter pudding cups are a creamy, delightful dessert featuring layers of smooth vanilla pudding, crunchy chocolate sandwich cookies, and festive chocolate eggs. Perfect for spring celebrations, they combine easy-to-make pudding with whipped topping and decorative candies for a fun and delicious treat.
Ingredients
Pudding Mixture
- 2 cups milk
- 1/2 cup granulated sugar
- 1/4 cup cornstarch
- 1 teaspoon vanilla extract
- 1/4 teaspoon salt
Toppings & Layers
- 1 cup whipped topping
- 1 cup crushed chocolate sandwich cookies (like Oreos)
- 1 cup chocolate eggs or candy-coated chocolates (for decoration)
Instructions
- Prepare the pudding base: In a medium saucepan, combine the milk, granulated sugar, cornstarch, vanilla extract, and salt. Whisk thoroughly until the mixture is smooth with no lumps.
- Cook and thicken: Place the saucepan over medium heat and stir constantly to prevent lumps, cooking the mixture until it thickens, which should take about 5 minutes. Once thickened, remove the pan from heat.
- Cool and fold in whipped topping: Let the pudding cool for a few minutes to avoid melting the whipped topping. Once cooled, gently fold in the whipped topping until the mixture is uniformly creamy.
- Assemble the pudding cups: Take 6 serving cups and start by placing a layer of crushed chocolate sandwich cookies at the bottom of each. Add a layer of the pudding mixture on top of the cookies. Repeat the layering process, ending with a final layer of pudding on top.
- Decorate: Garnish each pudding cup with chocolate eggs or candy-coated chocolates to create a festive Easter look.
- Chill and serve: Refrigerate the pudding cups for at least 1 hour to allow them to set and chill before serving. This makes the dessert refreshing and enhances the flavors.
Notes
- Use full-fat milk for creamier pudding or low-fat milk for a lighter version.
- For a vegan option, substitute milk with almond or oat milk and use dairy-free whipped topping.
- Crush cookies in a sealed bag using a rolling pin to get fine crumbs without making a mess.
- These pudding cups can be made a day ahead and stored covered in the refrigerator.
- To add texture, sprinkle some chopped nuts or mini chocolate chips between layers.
- Prep Time: 10 minutes
- Cook Time: 10 minutes
- Category: Dessert
- Method: Stovetop Cooking and Assembly
- Cuisine: American
Nutrition
- Serving Size: 1 pudding cup (approx. 150g)
- Calories: 320
- Sugar: 28g
- Sodium: 150mg
- Fat: 14g
- Saturated Fat: 8g
- Unsaturated Fat: 5g
- Trans Fat: 0g
- Carbohydrates: 42g
- Fiber: 2g
- Protein: 4g
- Cholesterol: 35mg
Keywords: Easter pudding cups, layered pudding dessert, vanilla pudding cups, chocolate cookie pudding, festive Easter dessert


