
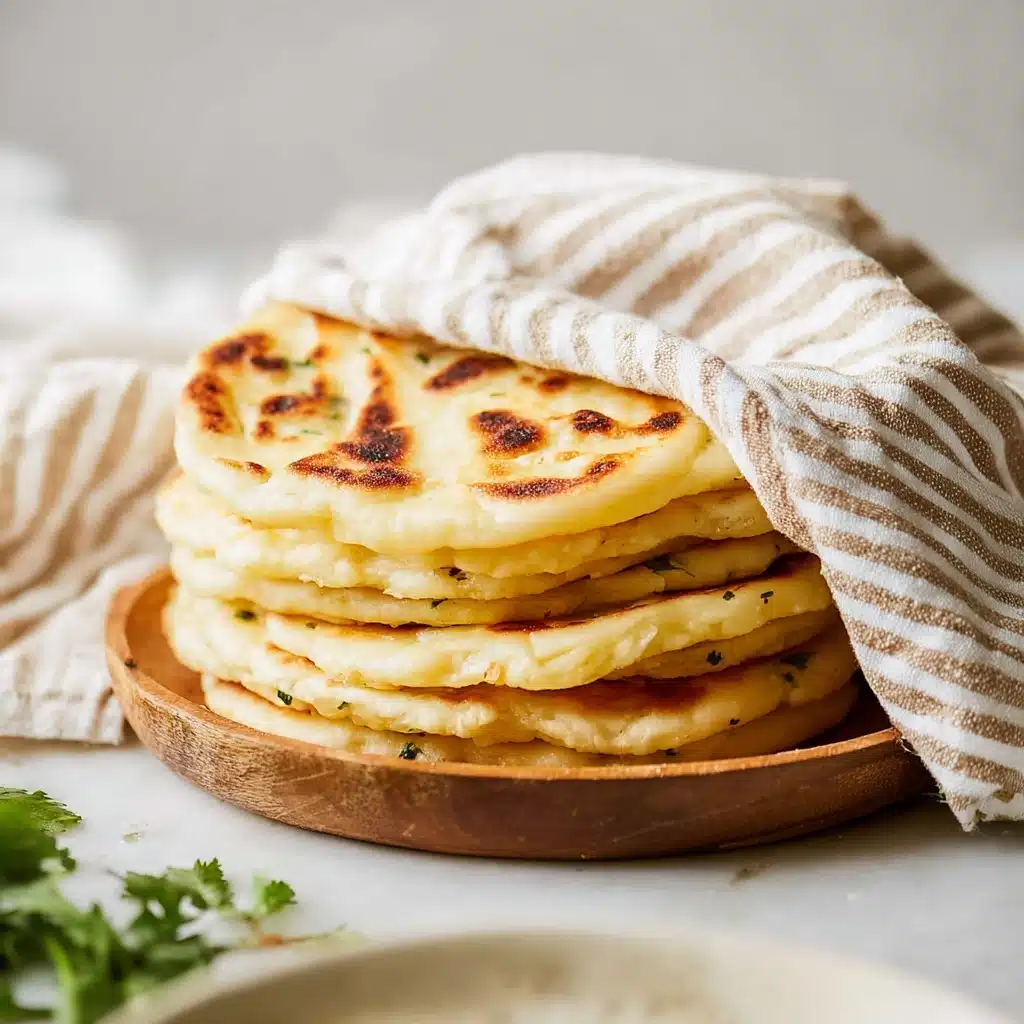
Best Ever Greek Pita Recipe
There is nothing quite like biting into the Best Ever Greek Pita: soft, warm, and perfectly pillowy with just the right hint of tang from the yeast and a gentle olive oil aroma. This pita bread is your new go-to recipe whenever you want that authentic Greek vibe in your kitchen, whether for sandwiches, dipping into tzatziki, or scooping up your favorite Mediterranean dips. The balance of these simple, wholesome ingredients comes together to create such a satisfying bread that feels homemade yet effortlessly impressive.
Ingredients You’ll Need
Ingredients You’ll Need
Creating the Best Ever Greek Pita is surprisingly simple, relying on just a handful of kitchen staples. Each ingredient plays an essential role in the texture and flavor—from the flour forming the dough’s soft structure to the olive oil adding richness and a tender crumb. Warm milk and water activate the yeast perfectly, while kosher salt brings that subtle savory touch.
- All-purpose flour (1 ½ cups): This is the backbone for your dough, providing the perfect balance of gluten strength and softness.
- Active dry yeast (1 tablespoon): The little magic maker that will help your dough rise and become wonderfully airy.
- Kosher salt (1 teaspoon): Enhances flavor and strengthens the dough’s texture.
- Warm milk (⅓ cup): Tenderizes the dough while bringing a slight creaminess.
- Warm water (⅓ cup): Vital for activating your yeast and hydrating the flour.
- Olive oil (2 tablespoons + more): Adds moisture, flavor, and keeps your dough wonderfully soft and easy to handle.
How to Make Best Ever Greek Pita
Step 1: Mix and Combine the Dry Ingredients
Start by whisking together your flour, yeast, and kosher salt in a large bowl. This ensures the yeast gets evenly distributed and your pita will rise beautifully. Mixing these dry ingredients first sets a solid foundation for your dough.
Step 2: Add the Warm Liquids
Pour in the warm milk and water blend slowly while mixing. The warmth wakes up the yeast and the milk adds richness, making the dough soft and flavorful. You want the mixture to start coming together but still slightly shaggy before the next step.
Step 3: Incorporate Olive Oil and Knead
Now add the olive oil and begin kneading right in the bowl. This is where things get fun — knead for a few minutes until the dough forms a smooth, elastic ball. The olive oil works to keep everything moist and adds a subtle depth to the pita’s flavor.
Step 4: Let the Dough Rise
Brush olive oil all over the inside of a clean bowl to keep your dough from sticking. Place your dough ball into the bowl, cover tightly with plastic wrap, and let it rest for about an hour until it doubles in size. This rest time is crucial for developing flavor and that perfect airy texture.
Step 5: Divide and Roll Out
Once risen, dust your surface with flour and transfer the dough out of the bowl. Cut it into 8 equal pieces—this ensures each pita cooks evenly. Gently stretch each piece with your hands into a small circle, then roll it out to about a ¼ inch thickness. You want them about 7 to 8 inches in diameter, perfect for stuffing or folding.
Step 6: Cook Each Pita
Heat a cast iron pan over high heat and add a teaspoon of olive oil. Cook each pita for about a minute on one side, drizzle a little oil on top, then flip and cook for another minute. The quick, high heat cooks the pita so it puffs slightly and develops those classic light golden spots.
Step 7: Optional Garlic Herb Butter Finish
For an extra touch of indulgence, brush your warm pitas with melted garlic and herb butter right after cooking. This adds a luxurious aroma and flavor that elevates your pita to next-level deliciousness.
How to Serve Best Ever Greek Pita

Garnishes
The Best Ever Greek Pita shines best with fresh and vibrant garnishes. Pile it high with crumbled feta, sliced cucumbers, ripe tomatoes, or a sprinkle of oregano for that authentic Greek taste. You can also add olives or a few basil leaves for an instantly refreshing bite.
Side Dishes
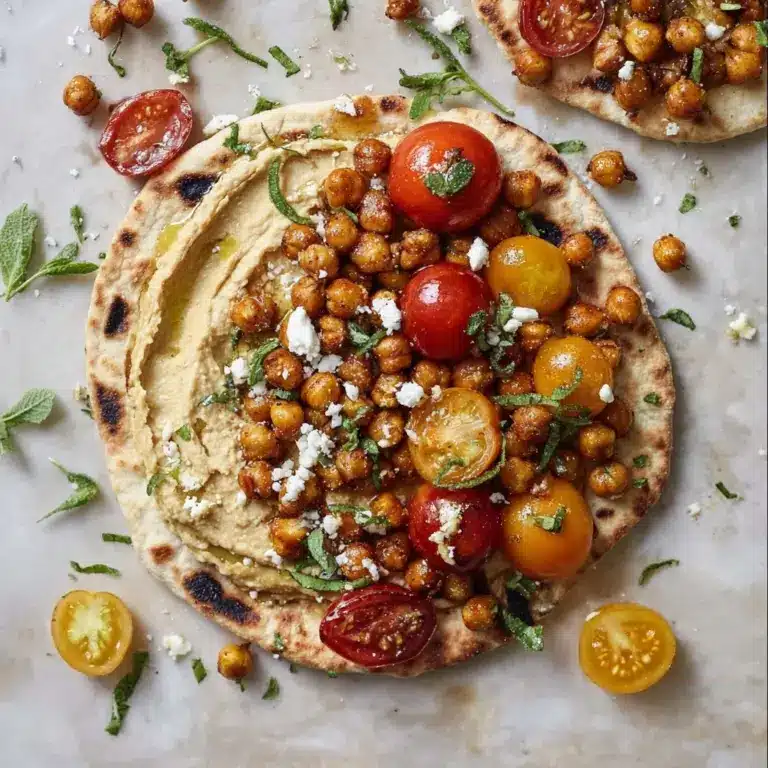
This pita pairs beautifully with classic Mediterranean sides. Think creamy tzatziki, tangy hummus, or even smoky baba ganoush. Grilled meats like souvlaki or kebabs are perfect accompaniments, turning your meal into a feast worth savoring.
Creative Ways to Present
Want to impress guests? Fold the warm pita around spiced lamb or chicken gyros, or cut into triangles and serve as a homemade pita chip with dips. For a casual snack, stuff it with fresh veggies and a drizzle of lemon juice for a light, refreshing wrap. The possibilities with Best Ever Greek Pita are truly endless.
Make Ahead and Storage
Storing Leftovers
Leftover pita stays soft and fresh when stored in an airtight container or zip-lock bag at room temperature for up to two days. Make sure to let them cool completely before storing to avoid any sogginess.
Freezing
You can freeze cooked pitas by placing parchment paper between each one to prevent sticking, then sealing them tightly in a freezer-safe bag. Frozen pitas keep well for up to 3 months and thaw quickly at room temperature.
Reheating
To reheat, wrap the pita in a damp paper towel and microwave for 20-30 seconds, or warm them in a hot skillet for a minute on each side. This restores their softness and warmth, just like fresh from the pan.
FAQs
Can I use whole wheat flour for the Best Ever Greek Pita?
You can substitute whole wheat flour for all-purpose flour, though the texture will be denser and the flavor nuttier. Try mixing half whole wheat with half all-purpose for a softer result with more fiber.
Is it necessary to use warm milk and water?
Yes, using warm liquids (not hot) activates the yeast properly, helping the dough rise better. Cold liquids will slow the process, while too-hot liquids can kill the yeast.
Why does my pita not puff up when cooking?
Make sure your pan is very hot and you roll the dough evenly thin. Also, handle the dough gently to keep the air pockets intact. Proper resting and proofing time are also important for puffing.
Can I make the dough ahead of time?
Absolutely! You can prepare the dough, let it rise once, then punch it down, wrap tightly, and refrigerate overnight. Bring it back to room temperature before shaping and cooking.
What can I use instead of olive oil?
Olive oil is key to the flavor, but you can substitute with vegetable or canola oil if needed. Keep in mind the pita will have a slightly different taste and softness.
Final Thoughts
Making the Best Ever Greek Pita at home is such a rewarding experience — it’s simple, quick, and yields a bread so delicious and versatile that you’ll wonder why you ever bought store-bought pita again. Whether tucked into sandwiches or enjoyed as a side, it’s a timeless recipe that can easily become a beloved staple in your kitchen. Give it a try, share it with friends, and get ready to fall in love with every warm, fluffy bite!
“`
Print
Best Ever Greek Pita Recipe
- Total Time: 1 hour 30 minutes
- Yield: 8 pitas 1x
- Diet: Vegetarian
Description
This Best Ever Greek Pita recipe yields soft, fluffy, and perfectly puffed homemade pitas. Made with simple ingredients including flour, yeast, olive oil, and warm milk and water, these pitas are ideal for sandwiches, dipping, or accompanying Mediterranean dishes. The easy-to-follow steps ensure even novice cooks can produce authentic Greek-style pita bread with a light texture and subtle flavor.
Ingredients
Dough Ingredients
- 1 ½ cups all purpose flour (plus more for surface)
- 1 tablespoon active dry yeast
- 1 teaspoon kosher salt
- ⅓ cup milk (warm)
- ⅓ cup water (warm)
- 2 tablespoons olive oil (plus more for the bowl and cooking)
Optional Topping
- Melted garlic and herb butter (for brushing on top)
Instructions
- Combine Dry Ingredients: In a large bowl, whisk together the flour, yeast, and kosher salt until evenly mixed.
- Add Liquids: Pour in the warm milk and warm water into the dry mix, stirring to begin forming the dough.
- Knead the Dough: Add in the olive oil and knead the mixture in the bowl for several minutes until a smooth dough ball forms.
- Prepare for Rising: Lightly oil a clean bowl with olive oil using a brush or fingers, then place the dough ball inside and turn it to coat with oil.
- First Rise: Cover the bowl with plastic wrap and let the dough rest at room temperature for about one hour, or until it doubles in size.
- Divide Dough: Dust a clean work surface with flour, remove the risen dough, and cut it into 8 equal pieces.
- Shape Pitas: Gently stretch each piece with your hands into a circular shape and roll out using a rolling pin until about ¼ inch thick, forming circles approximately 7-8 inches wide.
- Heat Pan: Heat a cast iron skillet over high heat and add 1 teaspoon olive oil, ensuring it coats the pan.
- Cook Pitas: Place one stretched pita in the hot pan and cook for about one minute until bubbles form and the bottom browns. Drizzle a little olive oil on top, then flip and cook the other side for another minute.
- Optional Finish: Once all pitas are cooked, brush with melted garlic and herb butter for added flavor.
Notes
- Ensure the milk and water are warm, not hot, to activate the yeast effectively without killing it.
- Use a cast iron pan or heavy skillet for best heat retention and even cooking.
- The pitas will puff up during cooking, creating a pocket perfect for stuffing.
- If you don’t have garlic and herb butter, you can simply brush the pitas with plain melted butter or olive oil.
- Store leftover pitas wrapped in a clean towel at room temperature for up to 2 days or freeze for longer storage.
- Prep Time: 15 minutes
- Cook Time: 15 minutes
- Category: Bread
- Method: Pan cooking/Griddle
- Cuisine: Greek, Mediterranean
Nutrition
- Serving Size: 1 pita (approx. 60g)
- Calories: 150 kcal
- Sugar: 1.5 g
- Sodium: 220 mg
- Fat: 5 g
- Saturated Fat: 0.7 g
- Unsaturated Fat: 4 g
- Trans Fat: 0 g
- Carbohydrates: 22 g
- Fiber: 1 g
- Protein: 4 g
- Cholesterol: 5 mg
Keywords: Greek pita, homemade pita bread, pita recipe, Mediterranean bread, easy bread recipe


